
Hi everyone,
I’ve been tossing around the idea of creating an HO scale abandoned amusement park for quite some time. I drafted a layout and created a list of everything I needed to buy or make. And I’ve waited. I wanted to use IHC Carnival products as they’re good quality, but tend to be less expensive than other HO scale ride brands. My ebay watchlist has been full of every option available in the US for awhile, as I’ve waited for prices to drop. Each kit ranges from $25 – 70 depending on which specific kit it is and on what day you find it.
Long story short, the other day, while wandering around a local flea market I saw 2 of the kits I’ve had my eye on behind the cash register at a tool shop. I asked the shop owner the price and he begins by saying that the 2 kits (carousel and ferris wheel) are sold together with the full train. As he’s speaking, saying it’s all sold together, I’m convinced it’s going to be way out of my meager price range. Then he goes “so for all 3, $30.” I was stunned, and well, I got a full carnival working train set, with engine, caboose and 3 cars, 6 clowns, a ferris wheel kit and carousel kit, plus a tractor and other industrial vehicle thrown in for good measure, all for $35. That’s around $200 worth of items. I was and am ecstatic.
The shop owner said he has a full storage unit of HO scale items he’ll be steadily pulling out, so I will surely be back.
In the mean time, I can finally begin working on making my abandoned amusement park a reality.
The idea is to build the whole thing on a large piece of composite wood, and then use it for tons of pictures and photo series.
Week 1 Progress
8/14 – 20/2016
(all progress shots were taken with my phone, so please excuse the non-perfect quality)
Day 1: 8/14/16
Acquired ferris wheel and carousel kits and train.
Opened ferris wheel kit to discover a whole other kit for concession booths!
Assembled the ferris wheel and gave everything a silver wash to emulate a metal construction with fading/chipping paint.


Day 2: 8/15/16
Gave the ferris wheel a brown wash to emulate dirt/ grime.
Added rust colored paint on joints etc.
Started work on the carousel. Attached some pieces together, painted the gold elements and the base. Added the dirt tone wash to all the large pieces. This set seems to have been worked on before. A couple of the large pieces are warped making lining them up a bit difficult.


Day 3: 8/17/16
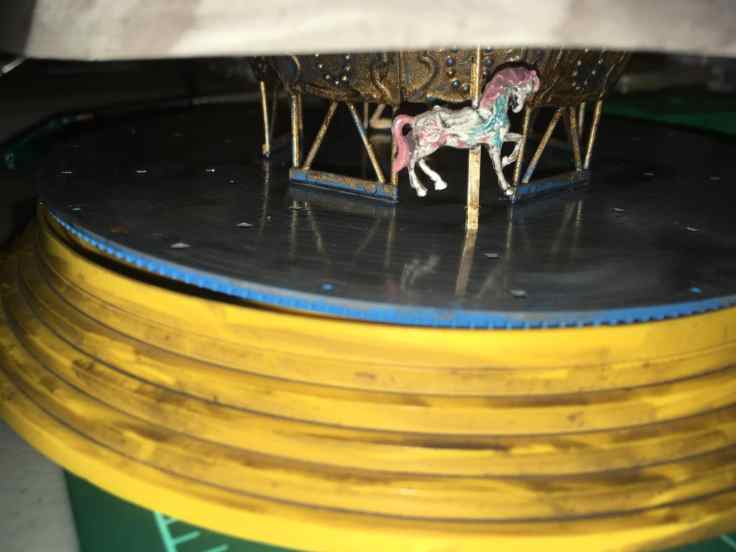
Finished painting and assembling the carousel. Those tiny horses will be the death of me. I didn’t go super detailed with the paint job, knowing I was going to make them grimy looking afterward anyway. With both of these rides I plan to pull more pieces off, add grass and weeds poking through, etc. But I’m waiting on that until I have the full park set up.
When the blue base sits right into the yellow base, the carousel can actually spin and the horses move up and down. That said, the blue piece is warped and doesn’t quite sit right where it’s supposed to. I may glue it down but haven’t decided yet. The idea is to create still images, so movement isn’t essential.


Added rust to the carousel top (not pictured). Still need to add rust to the smaller pieces.
Built and painted the concession booths. The ones pictured below were still wet, as with most the images above. They will be less shiny when dry.
Painted some tools I had from a previous set.
Began gathering and painting other details from other sets I have around. The ones pictured below still have a lot of work to be done on them. I plan to make a maintenace/workshop area behind the carousel with these items and some extra carousel horses. I’ll also be making other items to be scattered around the park – mostly trash/debris.
Began 3D designing other small detail pieces for printing. So far I have round dining tables and chairs, benches and sidewalk segments. Here’s to hoping they’ll print well and be usable. The smallest scale I’ve printed small object for so far is O scale, and these will be half that size.


So that’s that for week 1. Pretty good progress I think. The next step is to get the base board and begin working on layout. I’ll need all the large pieces, i.e. rides ready before I can start adding everything together. I’ll be working on some more 3D designs and prints as well.
Let me know what you think so far.
Read part 2 here.